Tl;dr…if you aren’t a fabric craft geek, this post will just bore you. That’s okay. I’m taking aim at a beloved part of recent Fashion History and dissecting it.
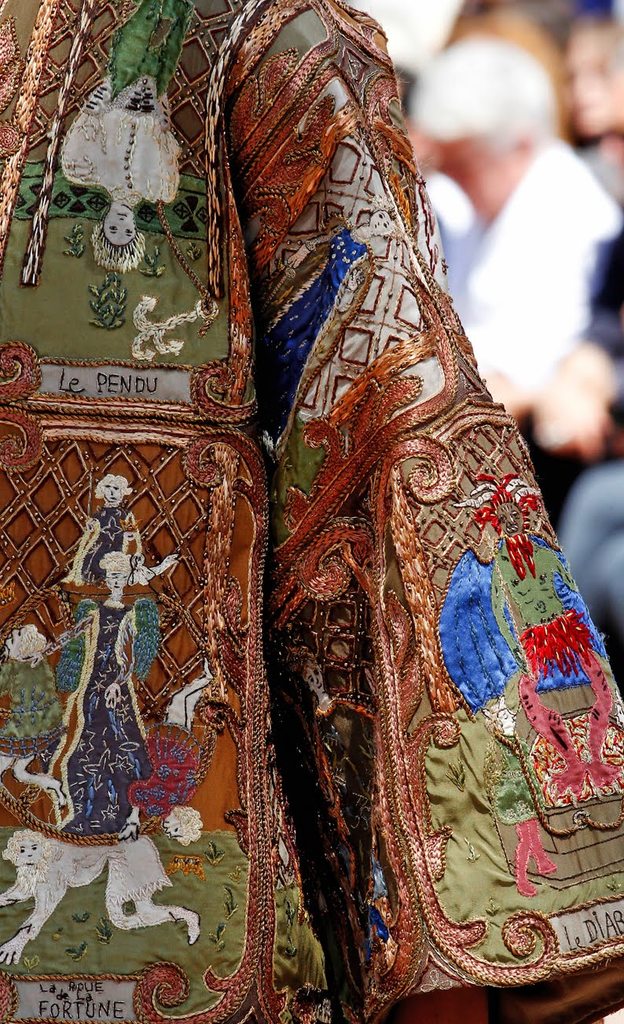
For the 2017-18 fashion season, Dior released a now legendary Tarot-inspired fabric coat.

If you don’t know much about embroidery, this mix of fabric pieces and stitches is merely eyecatching and fun.
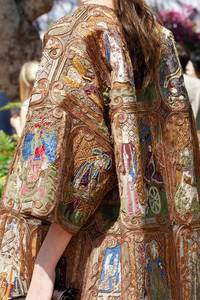
If you know *a little more* about embroidery, it’s a faerytale, a coat out of Medieval European legend.
But wait, it’s playing tricks on your eyes!
If you know a fair amount of embroidery shortcuts, these leap right out at you. They don’t detract from the 1500 hours it took to create the garment…but they do trim down the 5000-10,000 hours it might have taken with other embroidery methods.
These are timesaving tricks any cosplayers or fiber crafter can use.
The Dior Tarot Coat’s big secret is 1) it isn’t all that much embroidery, it’s mostly fabric applique. And 2) the embroidery stitches on it are often large. Most of the color fields are solid fabric, with embroidery accents.
These shortcuts are still a lot of work: creating paper patterns, deciding on colorways and contrasts, assembling the fabrics and thread, and laying out the separate garment pieces. Keeping everything organized would be tricky.
The long method of assembly is pinning fabric in place, turning edges under, and handstitching each Tarot motif to a very light weight muslin or cheesecloth backing. At this point, there is no surface embroidery.
The fast & dirty way to stick down the fabric pieces would be dots of *washable* fabric glue.
I don’t think I see machine zigzag stitching on the edges, so they’re still probably turned under and handstitched.
Fusible interfacing would leave too ‘flat’ a surface; the coat has some puffiness and depth that might also be helped by light stuffing. Washable glue would hold everything together at the construction stage.
Now on to those decorative accent stitches in the designs and the frames. Some of them are heavy cording and *huge*. This means fast coverage, high texture, and great visual registry at a distance.
The effect is charmingly ‘rough’. The colors shimmer on the brownish-gold background fabric.
But is it great embroidery?
Not really. It’s pretty in itself, but the charming clunkiness is a kind of Tl;dr version of real historical garments.
Go ahead, throw things at me.
Asian embroidery has many flat and textured embroidery techniques that are meant to please viewers at both ‘stage’ and ‘intimate’ viewing distances.
So do various styles of old European, African, Central American, and South American embroidery.
One precise way to judge embroidery is by the size of the stitches. Fabric for the tourist or import trade is often embroidered with long stitches, maybe up to an inch long, with longer ‘floats’ at the back between surface motifs.
‘Art stitchers’ often use inch-long or longer stitches to get lovely landscape or atmosphere effects. The downside: these pieces can’t be worn without damage to the stitches. They have to be displayed either on a square stretcher bar frame or an embroidery hoop.
Fabric *to be used* needs embroidery with smaller, more stable stable stitches.
Look at this Ukrainian(?) embroidery.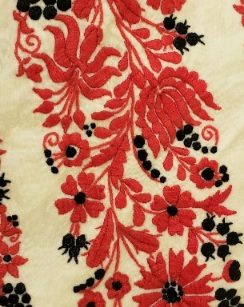
Or this Palestinian tatreez cross-stitch, made in tiny, loose stitches over waste-canvas on black cotton. 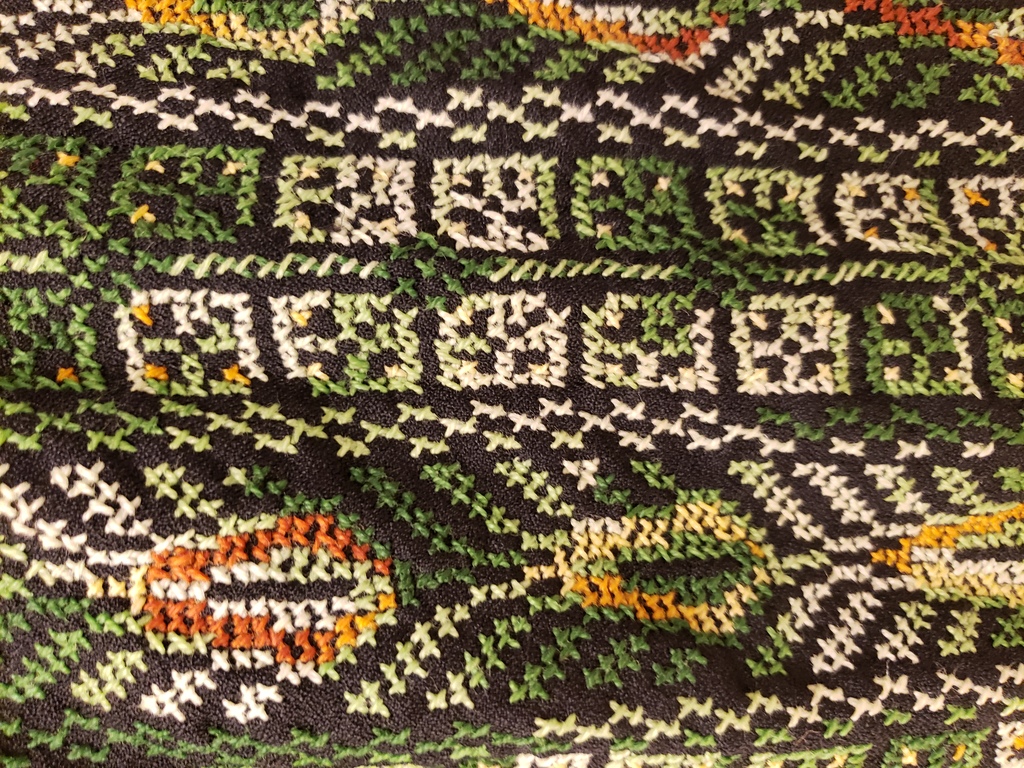
Here’s detail of a Central American huipil tunic with (parrots?) in tight pearl cotton embroidery. 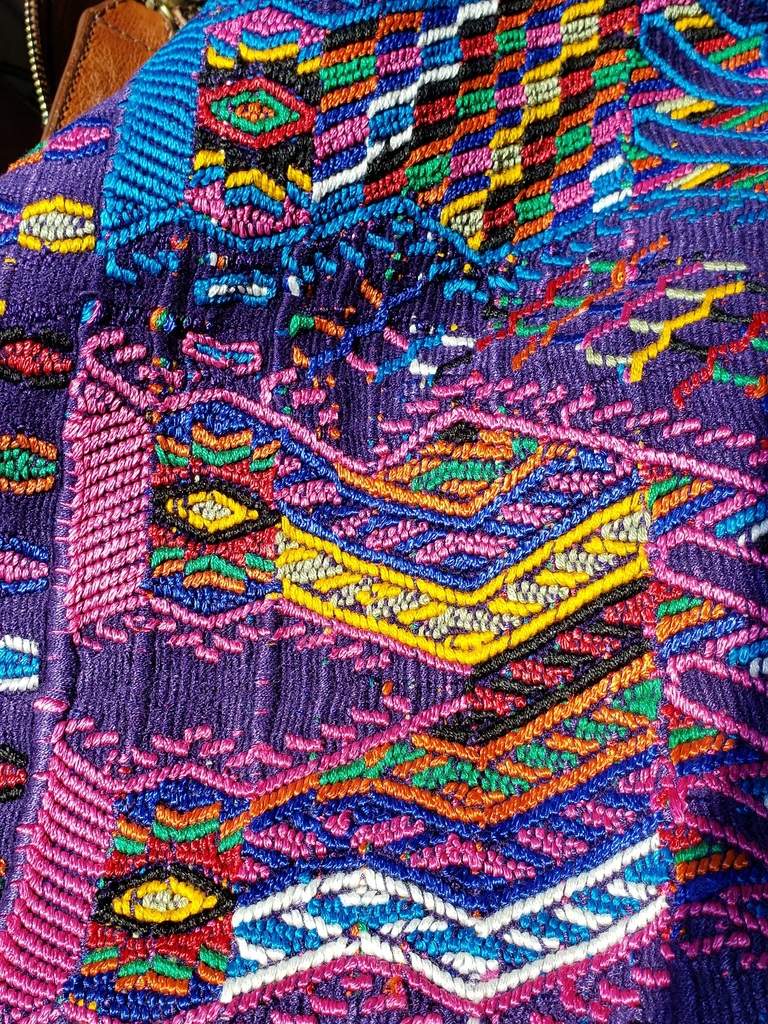
And some Guatemalan fabric, with sturdy, short, and precise stitches.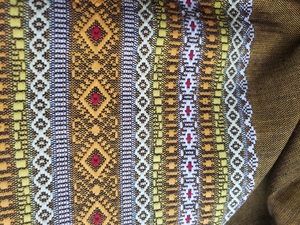
Look up Opus Angelicanum, a British Medieval embroidery that fills the fabric with satin stitches.
Is the Tarot Coat lovely? Sure, and it’s a hallmark of ‘slow fashion’ backlash against soulless fast-fashion cheap garments.
Is it the *most* it could have been?
No…and that’s where skilled, brave crafters can take inspiration from it.